
The Plain and Simple Way to Create SPN and Service Connection for Azure DevOps Pipelines

If you are getting started with Azure DevOps Pipeline for Application Deployment in Azure, you need two basic things for your Azure Pipeline to Authenticate and deploy to Azure. One — a Service Principal Name (SPN) in Azure and a Service Connection in Azure DevOps.
In this article, I’m going to show you how to quickly create SPN in Azure Portal and a Service Connection in Azure DevOps.
Background — Azure SPN and DevOps Service Connection
TL; DR: You can skip this section if you just want HOW TO guide. Just jump to Creating an Application Registration and SPN in the Azure Portal section to get started.
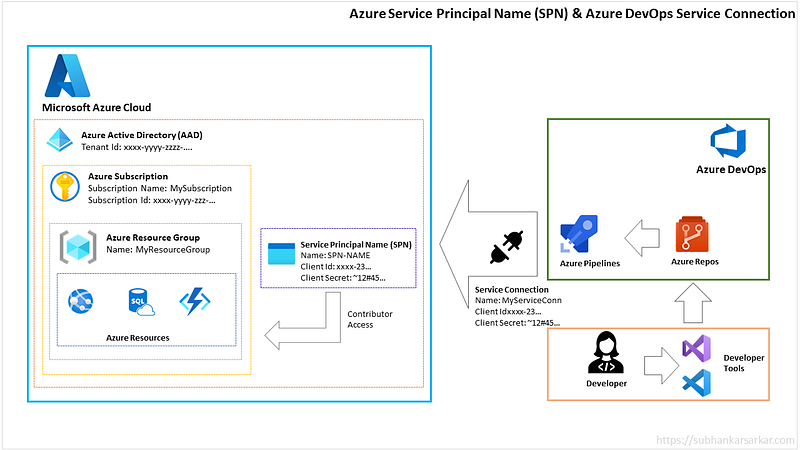
For simplicity, think of SPN as a service account in Azure Active Directory. An Active Directory can be mapped with multiple Subscriptions. A subscription can have one or many resource group(s). These resource group(s) contain various Azure resources (ex: App Service, Azure Function, etc.) where you want to deploy your code (see the diagram above).
For an Azure DevOps pipeline to deploy something to Azure Resources, it needs to authenticate itself. It needs contributor privilege so that it can write the build artifacts to the Azure Resources. Azure DevOps uses a service account (SPN) with contributor access to create a Service Connection to Azure. This service connection allows the pipeline agents to connect to Azure and deploy the code.
Okay, now let’s jump into the action —
Creating Application Registration and SPN in the Azure Portal
To start with, you will have to do an App registration which will create the SPN.
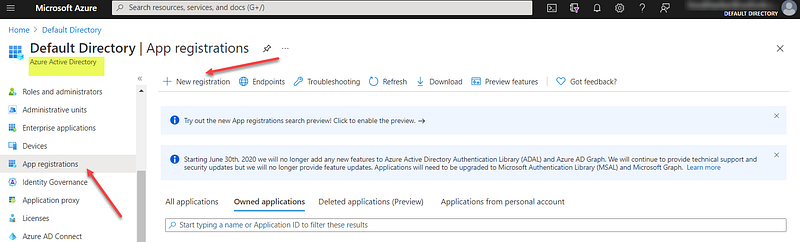
In the Azure Portal, go to Active Directory and select App registration. Once you are on the App registration page, click on the + New registration.
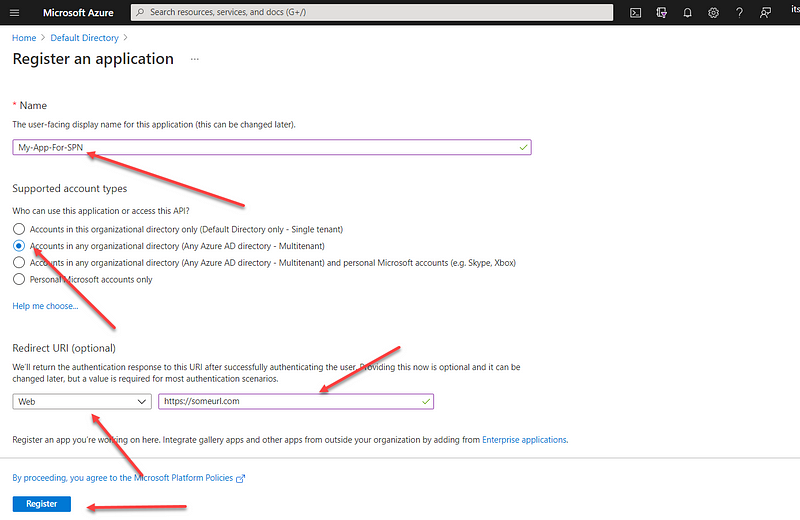
Use a unique Name for the app, chose Supported account types. Now in the Redirect URI select web or give some URL (this is an optional step; you can use localhost too). Click on the Register button. This will create your application registration.
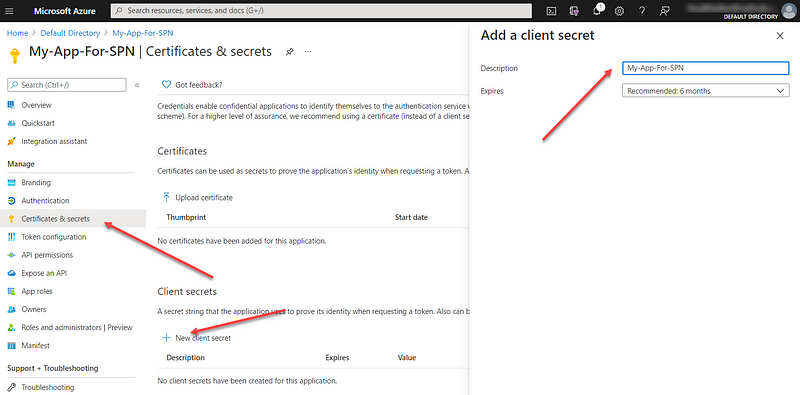
Once the App is registered, the next is to create the Client Secret. Select Certificates & secrets from the left blade. Click on the New client secret option and provide some Description & Expiry date of the Secret. Click on the Add button at the bottom. This will create the secret (think it is as password).
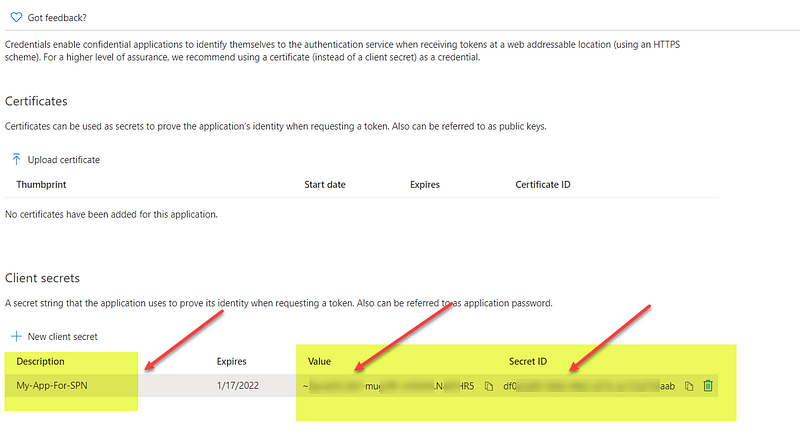
Copy the Value and keep it safe and handy. Next, you will need to get the Client ID, Directory (tenant Id) ID and Subscription name, Subscription Id.
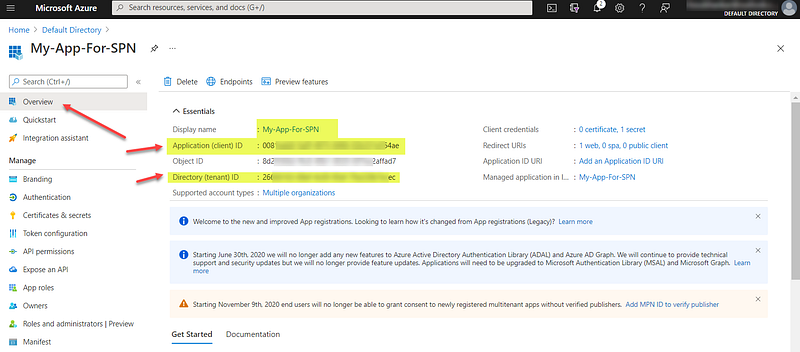
For Client ID and Directory (tenant) ID go to Application Registration’s Overview page and copy them.
This completes your SPN creation. Next, you will have to grant this SPN the contributor access to the Azure resource group(s).
Grant Contributor Access to the Azure Resources
Now the Application is registered, and you got the Client Id, Secret for this app in previous steps. To grant SPN the contribution access to the Azure resource group, go to your resource group where you want to add this service account (SPN) as contributor.
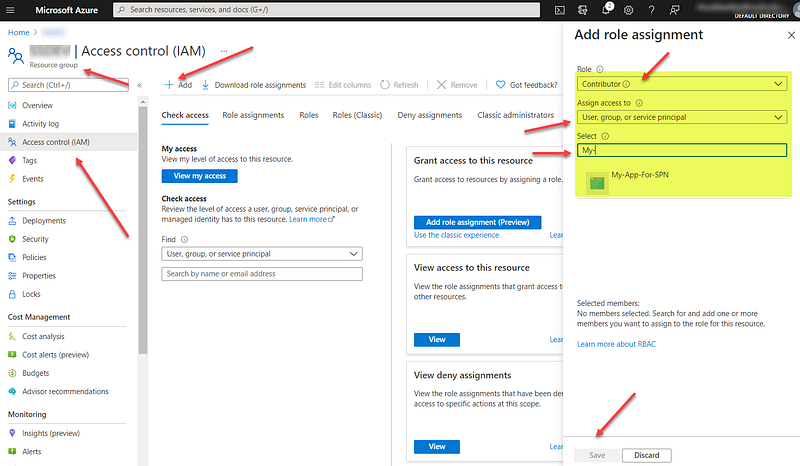
From the left blade, select Access control (IAM), +Add, select role as Contributor, Assign access to User, group or service principal. In the Select text box search with the app registration name, created in the previous steps. Once the app is visible in search select that and Save.
Okay, you are done with the first 2 steps. First — creating the app registration (creation of SPN). Second — granting the SPN the contributor access in the resource group where Azure DevOps pipeline will deploy your code.
Next step is creating the Service Connection in the Azure DevOps portal with the help of the SPN.
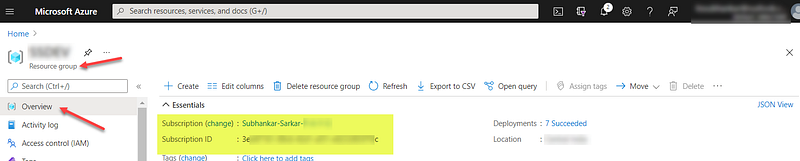
Before leaving the Azure Portal copy the Subscription name and Subscription id from Resource Group’s Overview page and keep them handy.
Creating Service Connection using SPN in the Azure DevOps portal
Switch the gear now and move to Azure DevOps Portal to create a Service Connection.
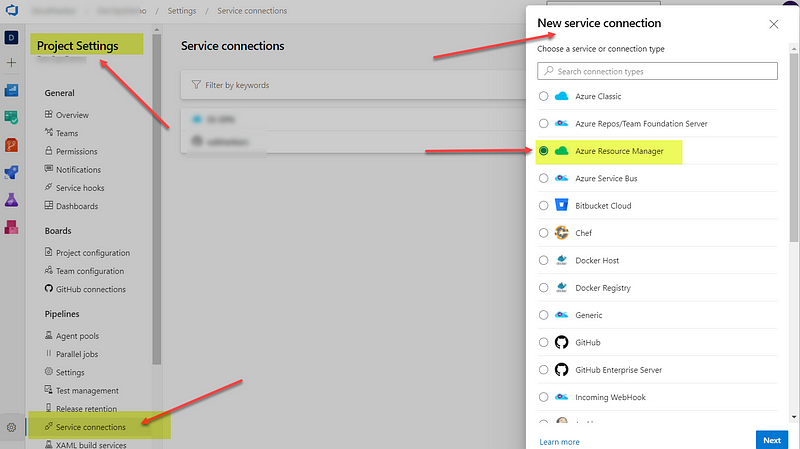
Go to the Project Settings page click on the Service connections. Click on the New service connection, then select Azure Resource Manager (I found it simple), click on Next. Select Service Principle (manual) option and go to the next page.
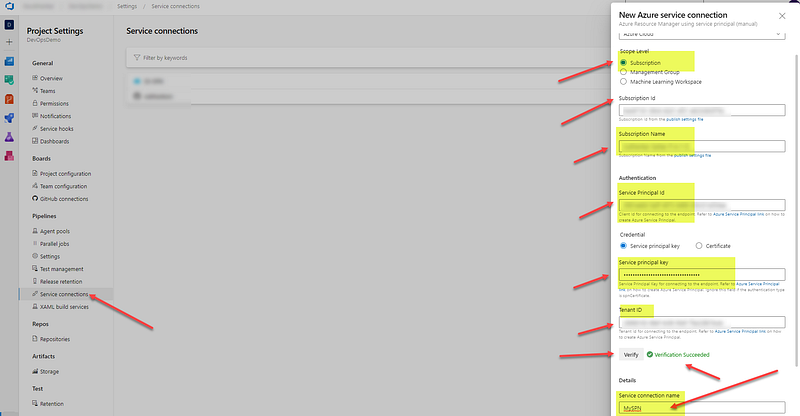
Select Scope level — subscription, Credential — Service principal key, Give a Name to your service connection. Click on the Verify button. If Verification is successful then Save it.
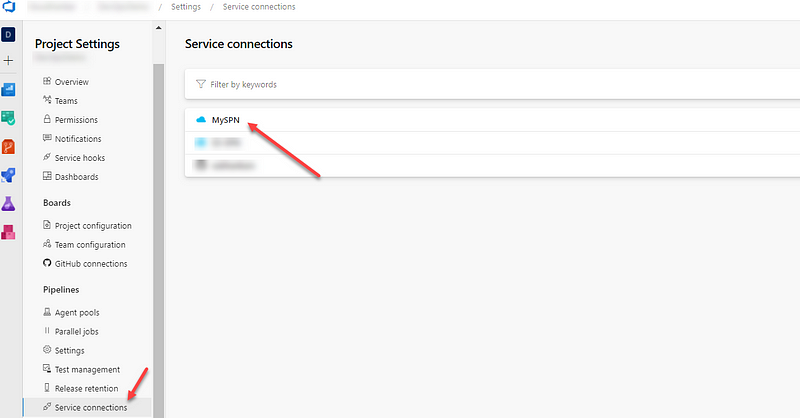
Viola, your SPN and Service Connection is created. You are now all set to create your first release pipeline in Azure DevOps.
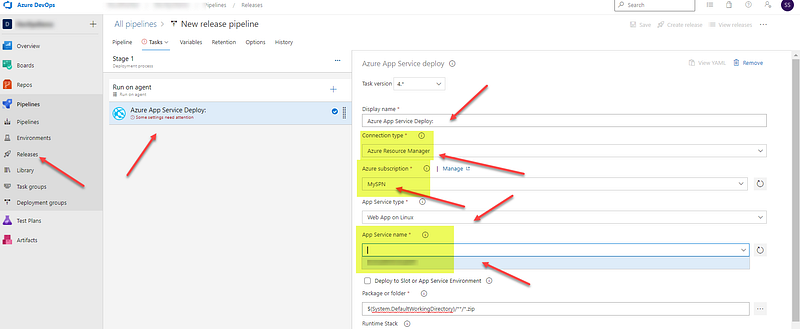
Using the Azure DevOps Service Connection in Release Pipelines
Now that the service connection is verified properly, you can use the Service Connection in the release pipelines as below –
The YAML way
#Example Publish to Azure App Service
- task: AzureWebApp@1
inputs:
appType: webAppLinux
azureSubscription: 'MySPN' #this is the name of the SPN
appName: $(azureAppServiceName) #App Service's unique name
package: $(Build.ArtifactStagingDirectory)/**/*.zip
The classic release pipeline designer way
Wrapping up
While I’m wrapping this article, it is needless to say that to perform these steps you need some degree of elevated privileges. If you have the blessing of your IT department then all the steps can be completed within 5 minutes.
There are many other options to create Service Connection and SPN for Azure DevOps pipelines. However, I have been using this technique for quite some time. I find this technique very intuitive and really quick for beginners with less learning curve.
I hope this helps, Happy DevOps-ing. Cheers…!!!


2 thoughts on “The Plain and Simple Way to Create SPN and Service Connection for Azure DevOps Pipelines”
Comments are closed.