
Background
WebJobs is a feature of Azure App Service that enables you to run a program or script in the same context as a web app, API app, or mobile app as per Microsoft Document.
If you build your WebJob Console app in .NET Framework then its very easy to build and deploy the WebJob with the parent API or Web App as by linking it to Web/Api App as below –

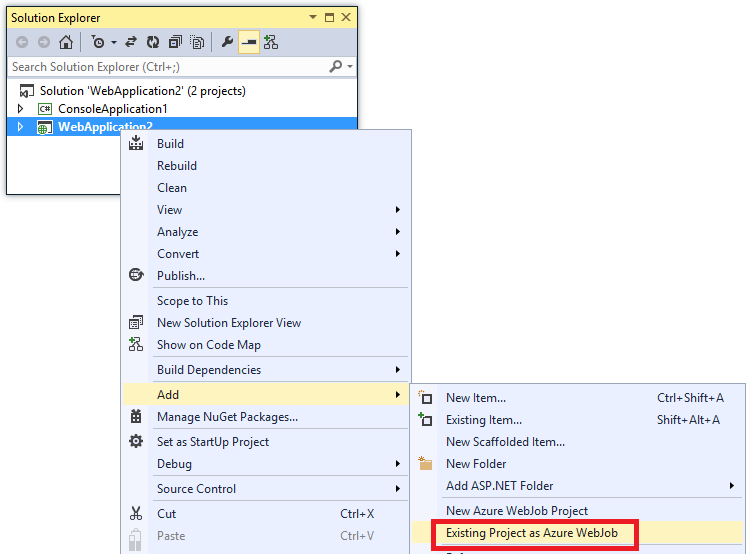
The above linkage of WebJob console application with parent Web/API app is not supported by design in .NET Core. So what do we do ?
In this Article we are going to see how we can build a .NET Core WebJob Console app separately from the parent Web/API app, and deploy under the existing parent Web/Api App using Azure DevOps Build and Release pipeline.
Build Pipeline – build the .NET Core Console app
To build a .NET Core console app we are need to perform 4 basic build tasks in Azure DevOps build pipeline.
dotnet restoredotnet builddotnet publish- Publish build artifacts to drop location
Azure Web Job supports the following file types only:
- .cmd, .bat, .exe
- .ps1 (using PowerShell)
- .sh (using Bash)
- .php (using PHP)
- .py (using Python)
- .js (using Node.js)
- .jar (using Java)
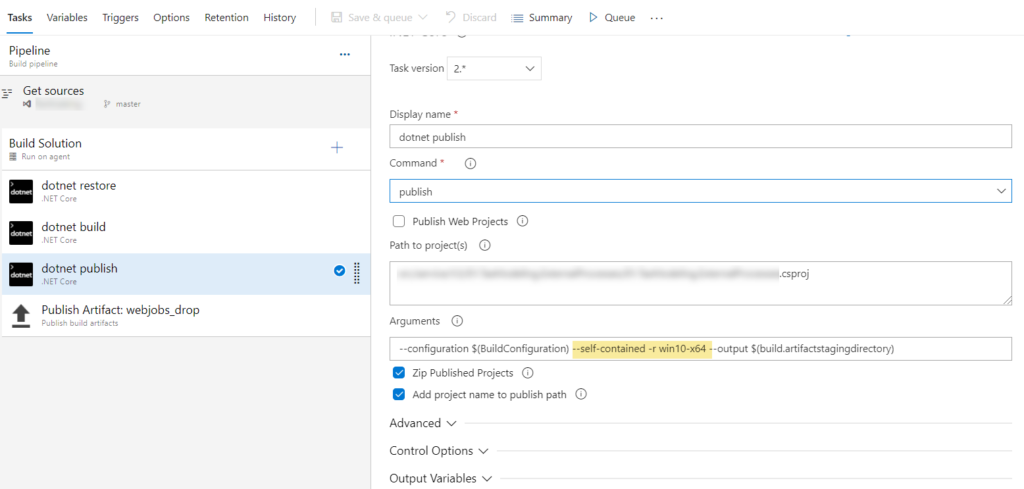
Since we are in .NET core, we are expecting a .EXE file as output for our console app. If you build your .NET core app just by running dotnet build it will generate a .DLL filebut not a .EXE file. To generate a .EXE file as build output use the following arguments in the publish step --configuration $(BuildConfiguration) --self-contained -r win10-x64 --output $(build.artifactstagingdirectory)
The argument --self-contained -r win10-x64 will make the difference here, this will generate .EXE file out of the build.
Next – Enable Zip Published Projects option. This will Create a ZIP file out of you build output.
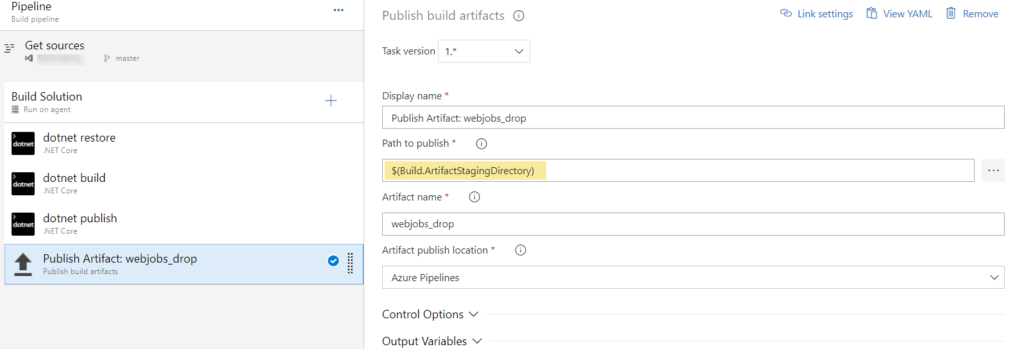
Once Publish to ZIP folder is completed in Step#3 we need to drop this ZIP file to a Drop Location. Use $(Build.ArtifactStagingDirectory) as path to publish. Use any artifact name of your choice. In this example the artifact name is webjobs_drop
Release Pipeline – deploy the build artifact to Azure App Service
Upon running the above Build Pipeline you will get your build output in webjobs_drop/.zip location.
To deploy this to any existing Web/API App’s WebJob running in Azure App Service we have to run a Azure PowerShell script task to achieve this.
We are going to use KUDU Zip Deploy API to deploy the build output to the app service. This will unpack the Zipped build output to wwwroot\App_Data\Jobs\\ folder
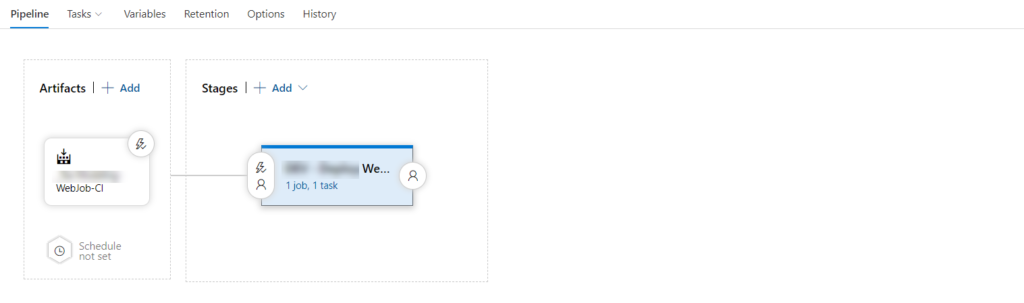
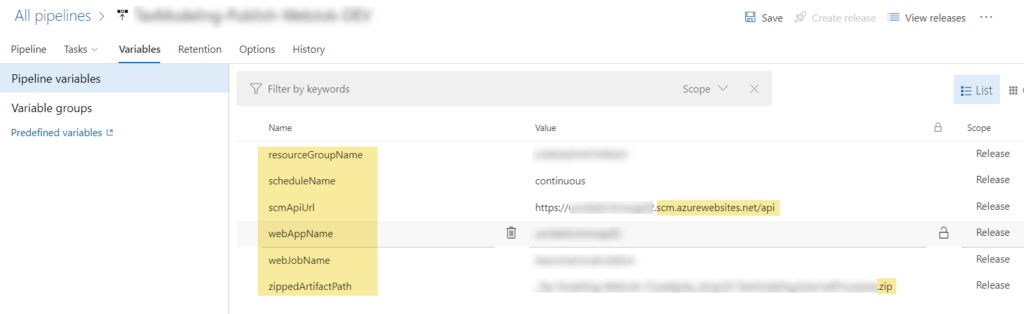
To Setup the release pipeline we need to create a Empty Pipeline with the following pipeline variables
resourceGroupName– Resource Group name of your applicationscheduleName– Contentious/ Triggered. In this example it’s ContinuousscmApiUrl– SCM Api Url. Example: https://.scm.azurewebsites.net/apiwebJobName– your webjob name. Your code will be deployed under wwwroot\App_Data\Jobs\scheduleName\webJobName folderzippedArtifactPath– zipped artifact path of your build output file
Once the variables are setup, we need to do the following
- Add a
Azure PowerShell script task - Select the Azure Connection type
- Select the Azure Subscription where your WebApp is located
- Select Script Type as Inline Script
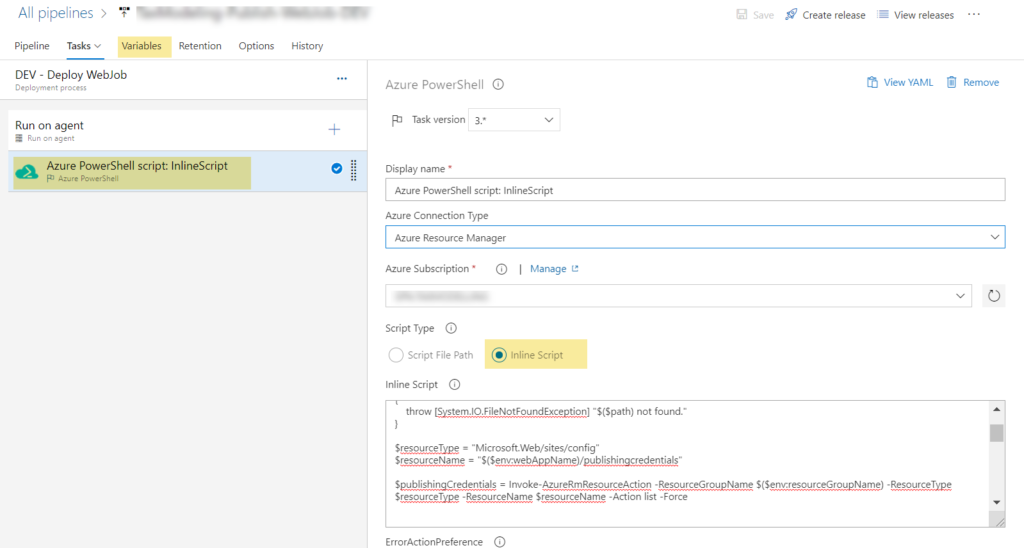
In the Inline Script editor add the below PowerShell script
This PowerShell script will Get the Publishing Profile details of your WebApp and use this information to login to KUDU ZipDeploy API to upload your Zipped build output to the desired location.
The deployment location is defined as
SCM Api url https://<>.scm.azurewebsites.net/api/zip plus virtual directory path site/wwwroot/App_Data/jobs/<continuous/triggered>/
Accessing environment specific configuration
Above Build and Release pipeline will build and generate .EXE file for your .NET Core Console application and deploy the build output to the Azure App Service Virtual directory. There may be scenarios where your WebJob may need to read some Environment (DEV, QA, UAT. PROD) specific configurations. In such cases you have to add environment specific appsettings.json files as appsettings.json
To read values from Environment specific json files, we can rely on ASPNETCORE_ENVIRONMENT variable. This variable can be set manually from the Azure Portal or while deploying the Parent WebApp/API app using Azure release pipeline in the app settings section.
Add the above code in your Program.cs file to read the environment specific values from appsettings.json files.
Wrap up
To summarize the .NET Core WebJob Console App CI/CD we have performed the following –
dotnet publishwith--self-contained -r win10-x64argument. Which generates the WebJob supported EXE file.- Zipped the build artifact directory.
- Used
KUDU ZipDeployAPI to publish the WebJob console application to the Existing Web/API App Virtual directory usingAzure PowerShell Scripttask.
I hope this article will help you to navigate through your .NET Core WebJob dev/deploy journey with Azure DevOps Build Release pipeline.