SQL Server 2017 on Linux - install database engine and manage it using cross platform SQL Operations Studio.

As we already know that Microsoft loves Linux and similarly SQL Server also fell in love with Linux. On October 2017 Microsoft announced the general availability of SQL Server 2017 for Linux. This relationship brought us many goodness in the table. This gives us freedom of Platform of our choice, unprecedented security of Linux, pricing of opensource with all great features, this are just few examples. Few of the studies also found that moving secondary databases to Linux paid for itself in less than nine months. Now you can imagine the possibilities of this movement.
To bring the SQL Server on Linux experience – in continuation of my previous post, in this post we are going to build an environment in Linux. We are going to Install SQL Server 2017 there. Will witness and feel how quickly we can install SQL server on Linux and start using it right away.
So… few of the things needs to be performed to have our SQL Server on Linux. These are as follows –
- Installing SQL Server 2017 on Linux Virtual Machine in Azure cloud.
- Create our first database in SQL Server on Linux using SQL Operations Studio (MSOS).
So far SQL Server is not supported in Windows Subsystem for Linux (WSL). Using WSL for SQL Server installation is not an option at this moment. We are going to create a Linux Virtual Machine in Azure. Will install SQL Server in the VM. Here Ubuntu is our preferred Linux distribution. Since installation of SQL Server needs 2GB and 6GB of disk space memory we are taking Standard A2 v2 plan with 4GB of memory for the VM creation.
Once the VM is provisioned then we can either start working with Azure CLI in the Azure portal or we can go a bit further and install remote desktop feature for Linux. Since we are familiar with the bash by now we will use Azure CLI to install SQL Server. We need to follow the following steps now –
Import the public repository GPG keys:
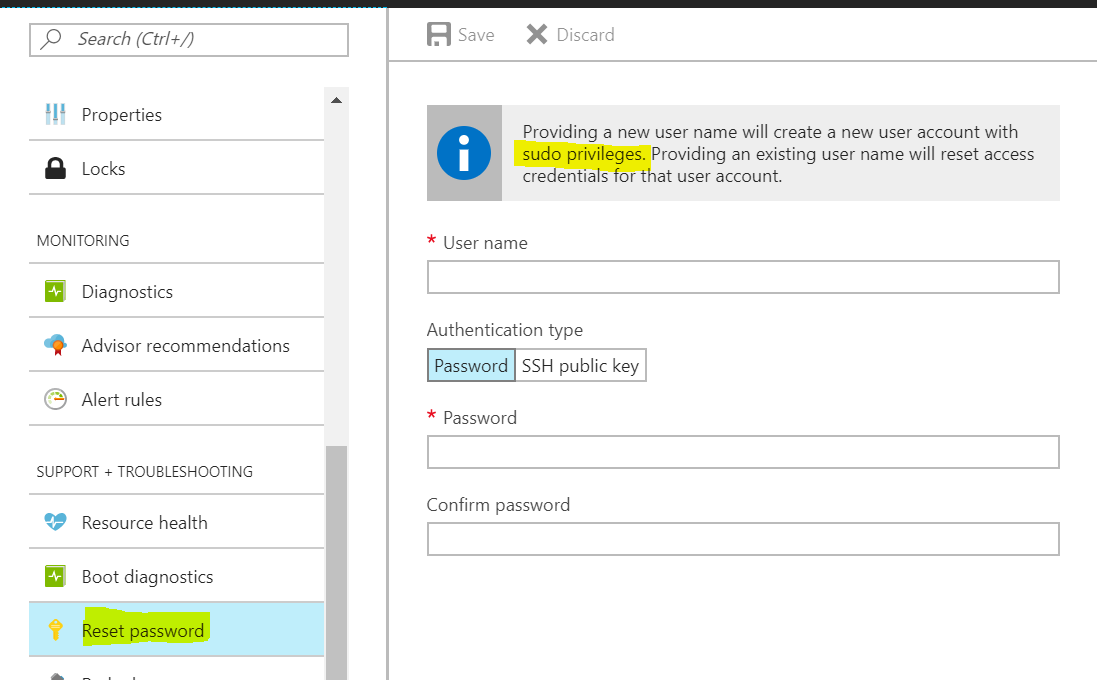
*** the default user in the CLI may not have sudo privilege. We need to create an another user with sudo privileges or change the existing ones password. You can do so by Reset Password option in Azure Portal.
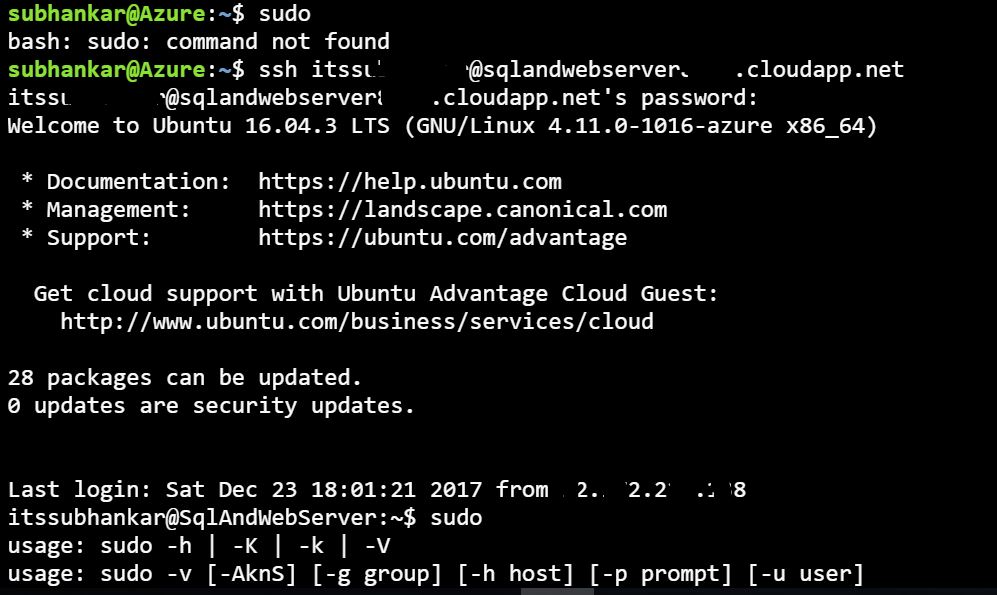
Once the user is created then change the user using this ssh command:
ssh [username]@[vm dns name]
Now you will have sudo privilege to run the following commands to install SQL Server:

Did you also notice how quickly SQL Server is installed on Linux under just 5 mins?. Now you might be wondering since the installation was so quick whether the SQL server instance is running at all or not? Okay now let’s check it. Go ahead and run this command in the CLI.

CREATE YOUR FIRST DATABASE IN SQL SERVER RUNNING ON LINUX:
By now we have got the green signal and got the go ahead from you database engine. Without further ado it’s time so see whether we can create a database, a table and run query on top of it.
Since we are talking Cross platform a lot, why not use a cross platform tool for our database development and management here?. Instead of using any command line tool or over used SQL Server management studio (SSMS) we are going to use a brand new lightweight database management tool called SQL Operations Studio.
You can download it from here (just make sure 1433 post is open). After installing it try to connect to your database in the Linux VM. SQL authentication will be used with the SA password that we have created during the setup process. If connection is successful then we should be able to see all system databases in the database explorer (looks similar to SSMS).
Now it’s time to create our own database in SQL server on Linux and run few queries to satisfy eyes 🙂
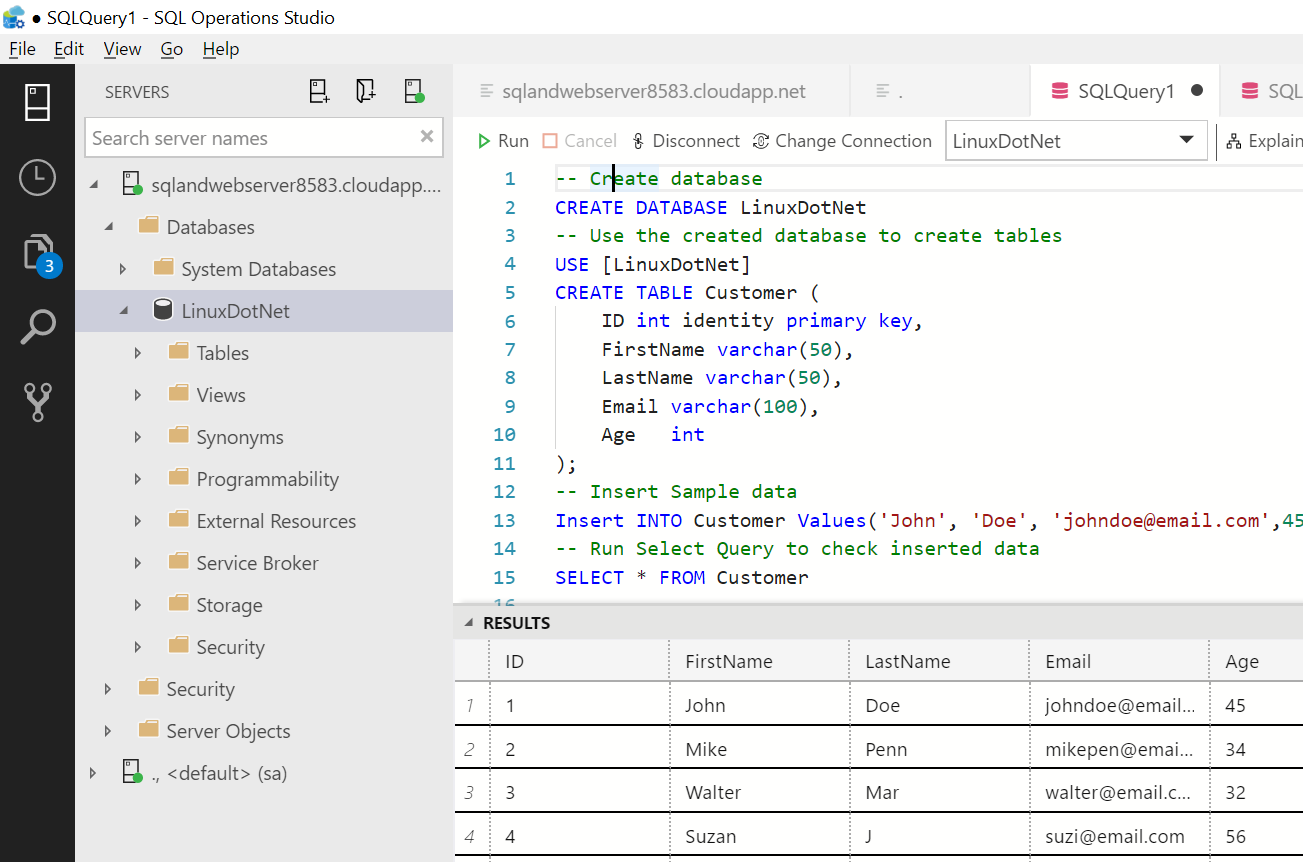
Once the database is connected we need to select the server node and click on the new query. A query window with intellisense will come up where you can write all our database query.
Here we are creating a database named LinuxDotNet using statement – CREATE DATABASE LinuxDotNet
Then creating a Customer table, inserting data using INSERT statement and finally running a SELECT query on top of the Customer table.
We have got our data back all the way from the SQ Server database running on Linux. So… our SQL server database is running inside a VM, and is fully wired up with MSOS. Similarly we can connect this database with SSMS and any SQL Command line tools to experience all the goodness.
## If you want to run ASP.NET Core MVC web app with Entity Framework Core against this database then get the project from GitHub and run it.
## Currently SQL Server is not supported in Windows Subsystem for Linux. If you like to see the feature in WSL then vote at Microsoft user voice here.