Native Linux on Windows 10? Yes! it's real. Let's see how.

Remember those old days when we had to use Linux’s VI editor to write C, C++ , Java code in our School/ College days? Do you also remember how we used to get that black UNIX terminal (Bash) in our Windows machine? Well…mostly we had to do telnet from our Windows system to the Linux server to get the terminal back so that we can use the VI editor and write some code.
I can remember in our programming lab we had a Linux server and it was connected to multiple Windows terminal. We used to telnet to the Linux Server to run the Bash and form there all other subsequent commands. If anyone wanted to configure a standalone system on their own with Windows and Linux then they had to undergo a lot of challenges. Starting from partitioning the hard disk, installing Linux from multiple CD, configuring dual booting and so on and so forth. Unfortunately if you miss a little thing, you mess the whole thing up, specially the boot loader. It was a golden time for the IT guys back then, they used to charge huge to Install Linux on your PC. Then Virtualization came and Installing Linux in a VM became a bit easier and less painful.
For web development or for basic programming we never needed a full-blown Linux setup with all the bells and whistles. The bash terminal was good enough to accomplish most of the tasks in hand. So why carry this heavy baggage of Linux with Windows all the time? Don’t we have a light weight solution for that?
Yes, fortunately we have a solution now. Windows 10 comes with – Windows Subsystem for Linux (WSL). This helps us to install Linux inside Windows OS. It may sound like a crazy thing but, yes, it’s true and we are going to see it in action in a bit.
So…no more dual booting system, no more VM. It’s a native Linux system inside Windows 10 we are talking about here. We can directly Install Linux distribution of our choice in Windows 10, such as Ubuntu, SuSe etc. We can now have a full-blown Linux Bash running on Windows 10. We can run Ruby, Python, C# (.NET Core) all inside Linux sitting at your Windows 10 PC. Just like using another command prompt side by side.
Exciting isn’t it? Without further ado let’s jump into it right away and see how we can make this happen.
Step 1: Check your Windows 10 version:
Windows Anniversary edition or above version can only supports WSL. To check : Run (Windows key + R) then type winver and hit enter. Now see the build number. It should be 16215 or later.
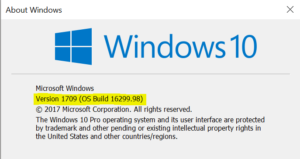
Step 2: Enable developer mode: Go to Settings >> Update and Security >> For Developers >> under Use developer feature check Developer Mode. It will show a warning message. Press Yes.
It may take some time to install the developer mode packages. Once you see this then exit from there.

Step 3: Enabling Windows Subsystem for Linux:
Go to control panel by – Run (Windows key + R) then type appwiz.cpl >> Turn Windows feature on or off.
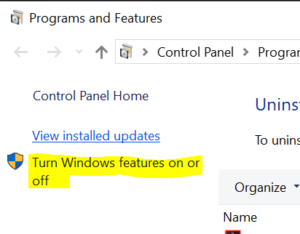
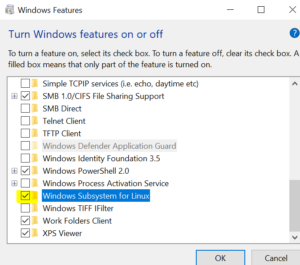
It’s going to search for required files and apply the changes and then will ask for Restart your PC.
Now all pre-configuration done. It’s time to install the Linux on your Windows 10 PC. If you have Windows 10 fall creator update (build 16215 or later) then you can download your Linux distribution from Microsoft store. (Ask Cortana to find it for you, if you are feeling Lazy 😊). Else open Microsoft Store and Search for Ubuntu (you can choose other distros also).
Step 4: Once you or your Virtual Assistant Cortana found the App then hit on Get button. It will download the file.

Once installed you will see a notification from Microsoft store saying that now you can launch Ubuntu. Hit the launch button.
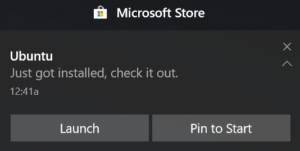
After hitting the launch button, for the very first time you will see a terminal with Ubuntu logo.

Step 5: Now you will be asked to setup a new UNIX username and password.

*** for older version of the windows (older than build no. 16215)
Open Command Prompt in Administrator mode >> type Bash >> it will ask you to accept the terms and conditions >> then it will start downloading Bash on Windows. Now follow above Step#5.
Once user name and password is set run apt-get update to get the latest update and you are done.
Your UNIX user name and password is created now. Observe the terminal now, can you see the prompt? username@hostname:~$ – are you able to recall your old days memories of Linux shell? Does this terminal look familiar? yes this is the Unix terminal running at your PC.

Can’t wait to test it’s functionality? Okay…Let’s run some basic commands like cal and date. Also let’s see if we could find Windows file system (under /mnt) from the bash or not.
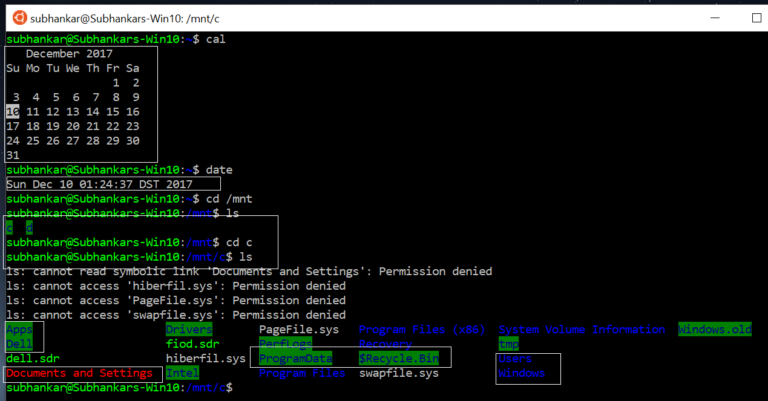
Look the bash is in action. It just ran some Unix commands, and that too from Windows.
So finally we have a fully functional Linux Bash terminal in our Windows 10. We are good to go for now. Going forward if you want to use this Bash then ask Cortana for Ubuntu and run it from there or alternatively Windows Key + R >> type bash and hit enter. Your bash is all yours to play around with.
If you have gone through my previous post then this post is the preparation phase of running .NET Core apps inside Linux. We will see how we can Configure .NET core inside this Linux and run C# applications in upcoming post.
Till then stay tuned and stay healthy.